Azure
Deploying R2R on Azure
Azure provides a robust and scalable platform for deploying R2R. This guide will walk you through the process of setting up R2R on an Azure Virtual Machine, making it accessible both locally and publicly.
Overview
Deploying R2R on Azure involves the following main steps:
- Creating an Azure Virtual Machine
- Installing necessary dependencies
- Setting up R2R
- Configuring port forwarding for local access
- Exposing ports for public access (optional)
This guide assumes you have an Azure account and the necessary permissions to create and manage Virtual Machines.
Creating an Azure Virtual Machine
- Log in to the Azure Portal.
- Click on “Create a resource” and search for “Virtual Machine”.
- Choose
Ubuntu Server 22.04 LTS - x64 Gen2as the operating system. - Select a VM size with at least 16GB of RAM, 4-8 vCPU cores, and 500GB of disk for a small-mid sized organization (< 5000 users). The
D4s_v3series is a good starting point. - Configure networking settings to allow inbound traffic on ports
22(SSH), and optionally7272(R2R API) and7273(R2R Dashboard). - Review and create the VM.
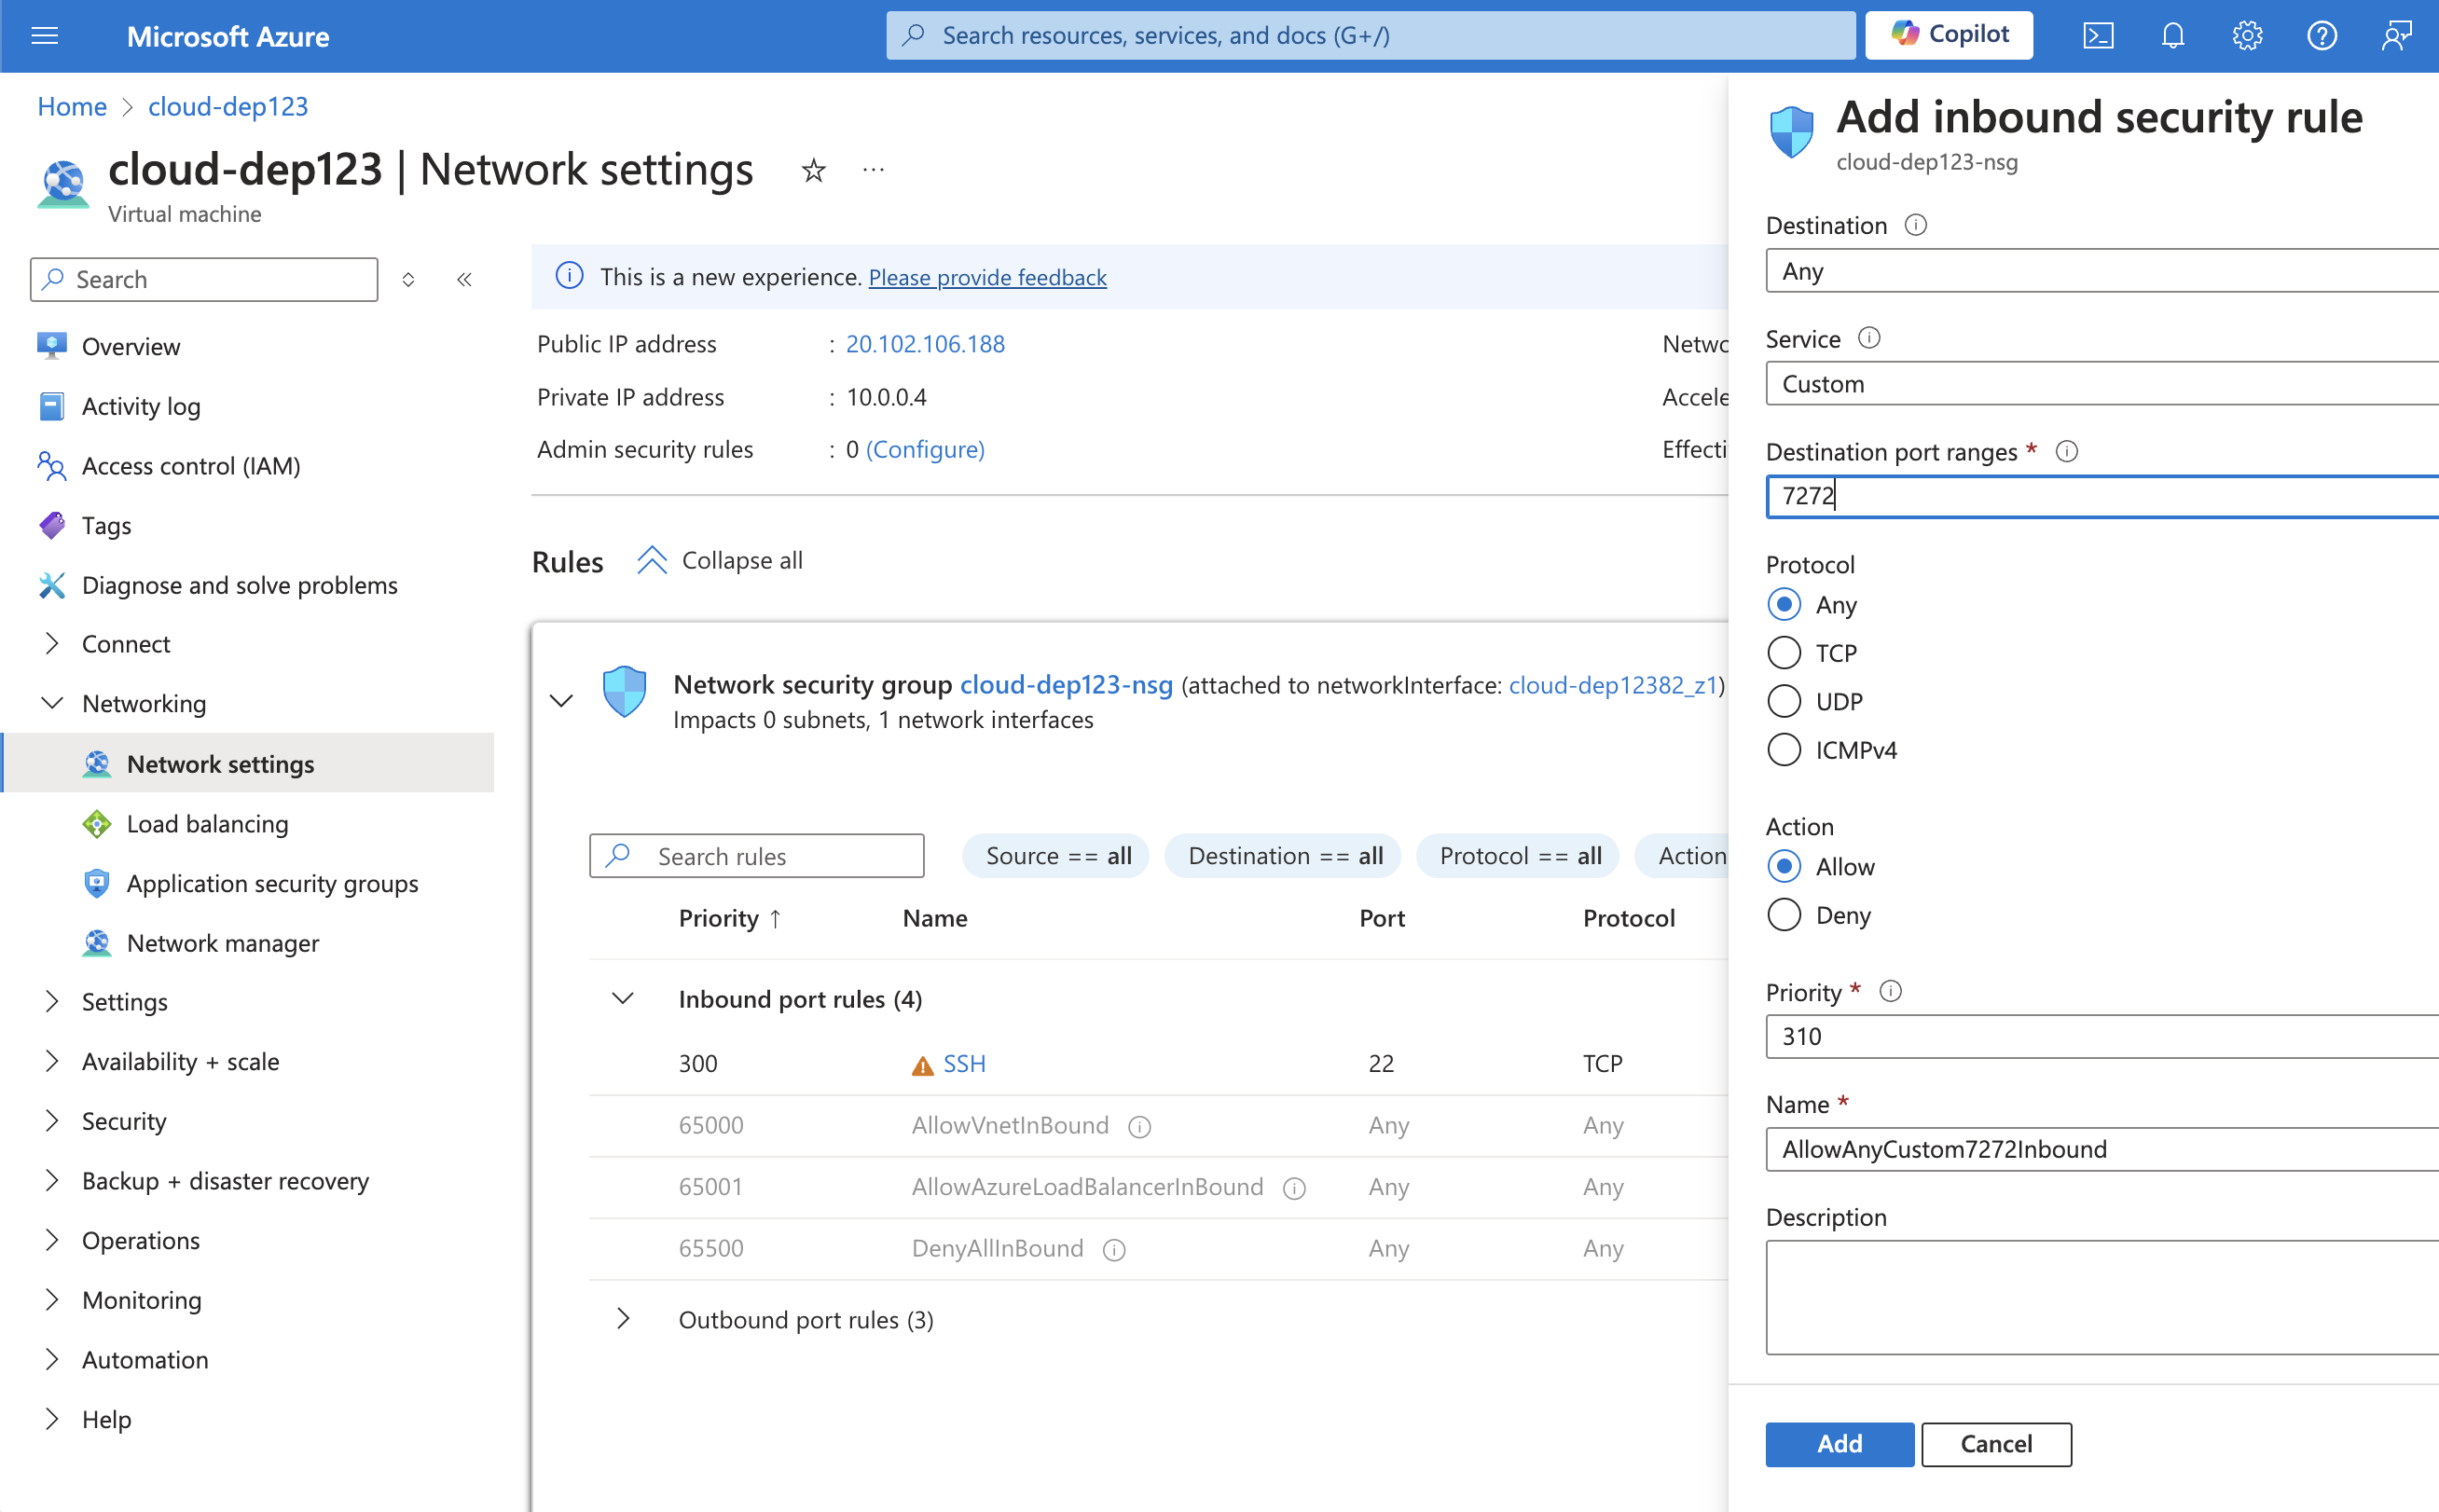
Exposing Ports for Public Access (Optional)
To make R2R publicly accessible:
-
Log in to the Azure Portal.
-
Navigate to your VM > Networking > Network Security Group.
-
Add new inbound security rules:
- Destination port ranges: 7272
- Protocol: TCP
- Action: Allow
- Priority: 1000 (or lower than conflicting rules)
- Name: Allow_7272
- Destination port ranges: 7273
- Protocol: TCP
- Action: Allow
- Priority: 1001
- Name: Allow_7273
- Destination port ranges: 7272
-
Ensure R2R is configured to listen on all interfaces (0.0.0.0).
After starting your R2R application, users can access:
- The API at http://YOUR_VM_ADDRESS:7272
- The dashboard at http://YOUR_VM_ADDRESS:7273
Installing Dependencies
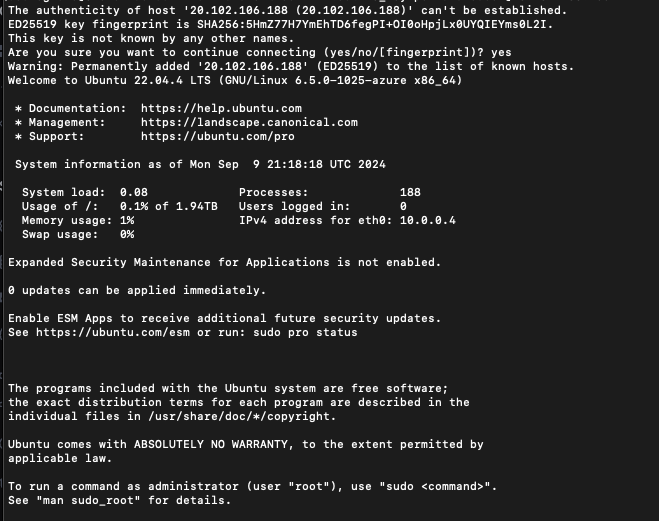
SSH into your newly created VM with a command like ssh -i my_pem.pem azureuser@YOUR_VM_ADDRESS:
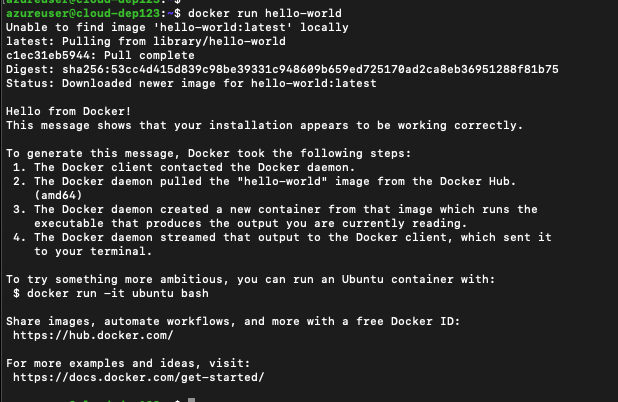
Now, run the following commands to install the necessary R2R dependencies:
Setting up R2R
- Clone the R2R repository:
- Set up environment variables:
Add the necessary environment variables:
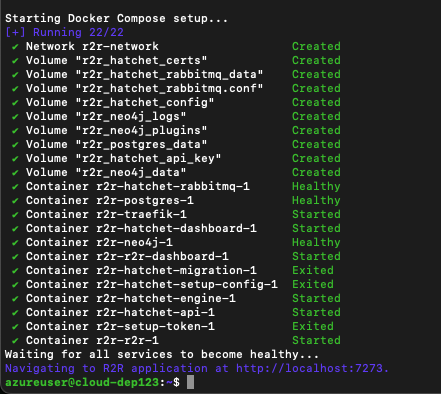
- Start the R2R services:
- Verify the health of the system:
Should return something like:
- Test ingesting and searching a sample document from a remote environment:
Replace YOUR_VM_ADDRESS with your Azure VM’s public IP address.
Configuring Port Forwarding for Local Access
To access R2R from your local machine, use SSH port forwarding:
This will allow you to access:
- The API at http://localhost:7272
- The dashboard at http://localhost:7273
Note that when using the R2R dashboard, you may still need to use the remote VM address as requests are made from the client-side.
Troubleshooting
If you encounter issues:
- Check Docker container status:
-
Verify environment variables are correctly set in r2r-full.env.
-
Ensure ports are correctly exposed in your network security group.
-
Check disk space and system resources:
- If services fail to start, try restarting Docker:
Security Considerations
- Use HTTPS (port 443) with a valid SSL certificate for production.
- Restrict source IP addresses in the security rule if possible.
- Regularly update and patch your system and applications.
- Use Azure Security Center for monitoring security posture.
- Consider using Azure Private Link for secure private connections.
- Enable Just-in-Time VM access to restrict inbound traffic.
- Deploy Azure Firewall for enhanced network security.
- Configure Azure Sentinel for security information and event management.
- Remove or disable the security rules when not needed for testing.
Conclusion
You have now successfully deployed R2R on Azure. The application should be accessible locally through SSH tunneling and optionally publicly through direct access to the Azure VM.
For more information on configuring and using R2R, refer to the configuration documentation or join our Discord community for assistance.